

Creating Airtable Table
1
Sign in your Airtable Account.
2
Add a base. The Airtable table will be automatically created in the base.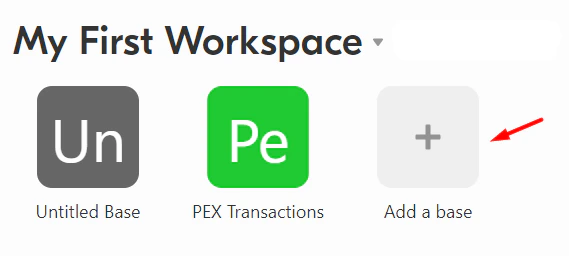
3
Name the base and the table.
Airtable Table Format
In order to sync transaction data from PEX, the Airtable table should have the following columns and strictly adhere to the below listed data format.Note:Column headers should be named exactly the same because the sync is case-sensitive.

Accessing App
To access the app:1
Log in to your account dashboard.pexcard.com
2
Navigate to Apps on the left side of your PEX menu.
3
Select the “Available” tab.
4
Scroll to locate PEX Connector for Airtable.
5
Click “More info” on the tile.
6
Click “Install”.
7
Click “Launch”.
Note:To install the app, you need to enable the following permissions: Edit business settings & apps, View card transactions. You can enable them in My Profile -> Permissions.
Initializing App
Once the app has launched, follow the steps:1
Click “Connect” to link your PEX account to your Airtable account.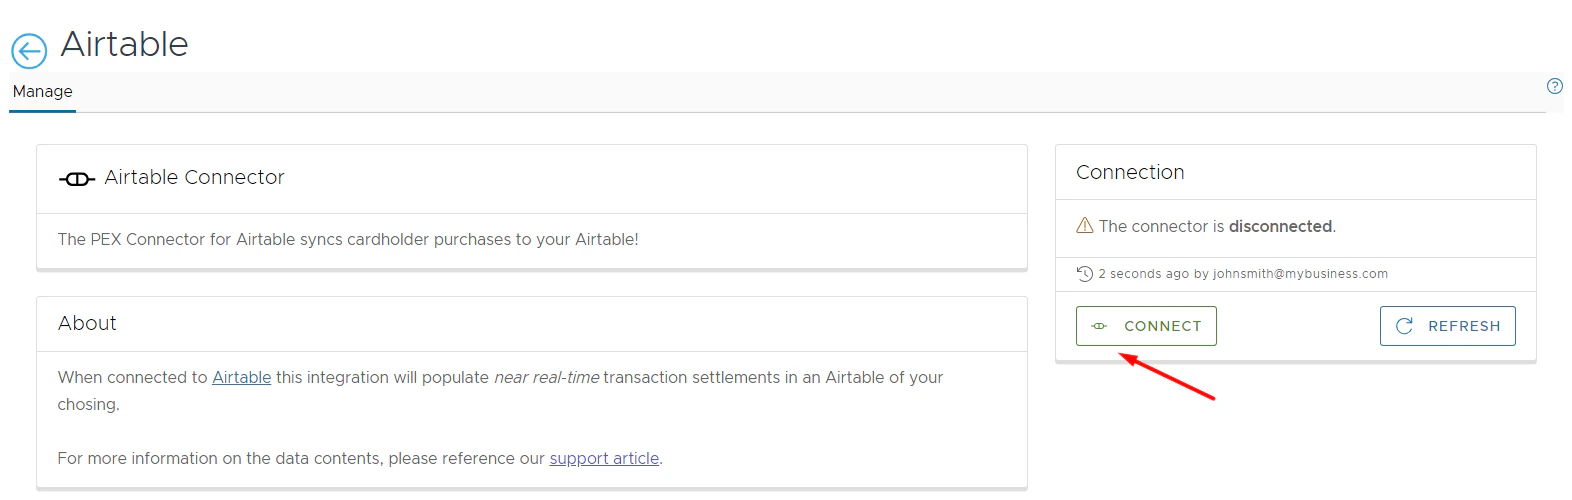
2
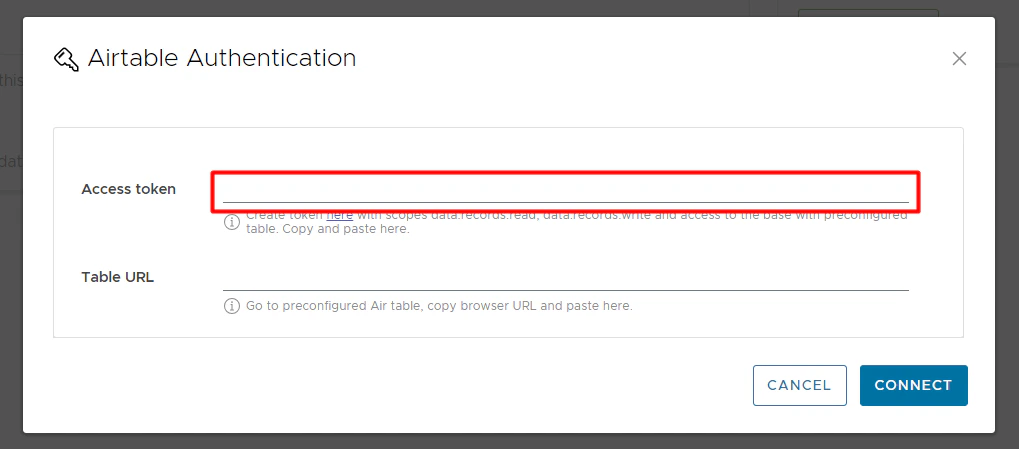
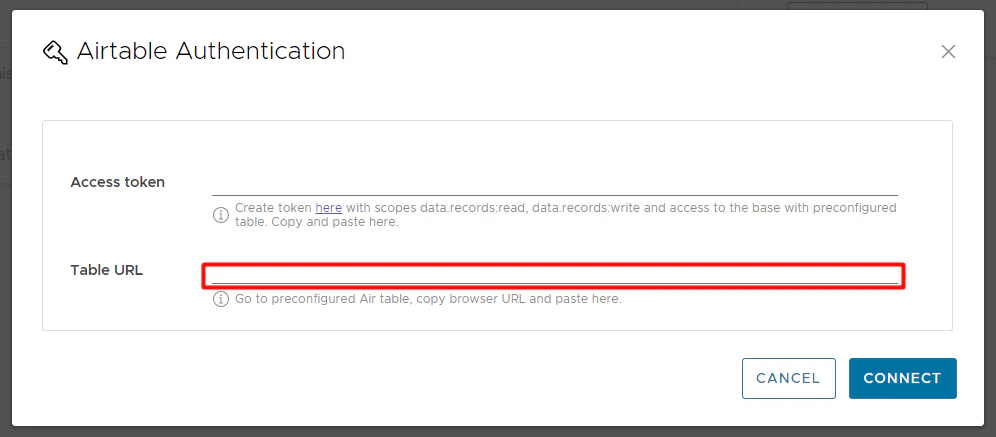
Enter your Access token and Table URL.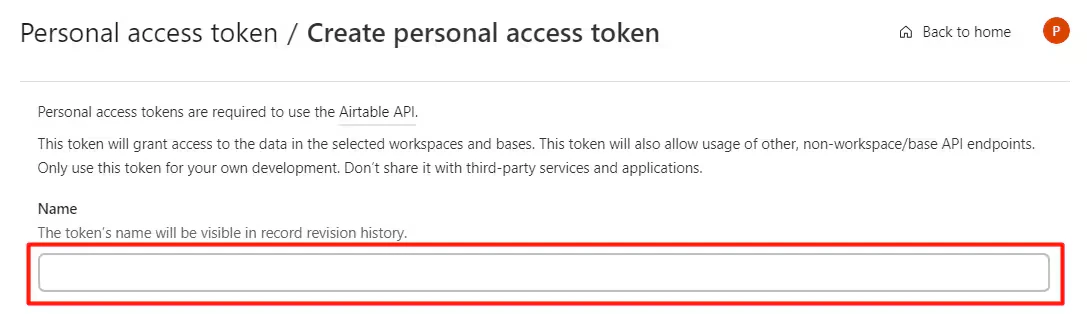

- To create a token:
- Go to https://airtable.com/create/tokens/new
- Name a token.
- Go to https://airtable.com/create/tokens/new
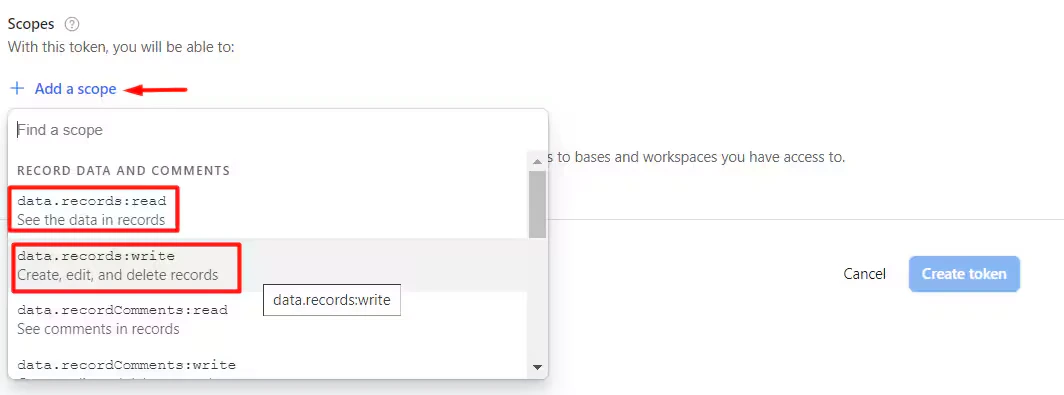
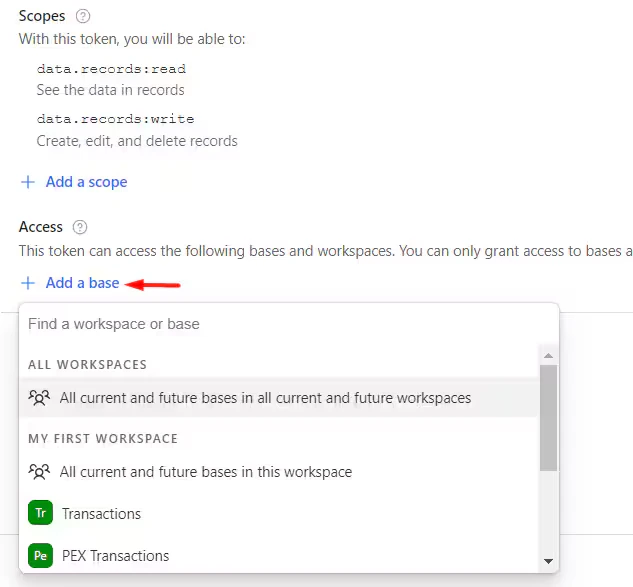
- Click ”+ Add a scope”.
- Select two permissions: data.records:read, data.records:write
- Click ”+ Add a base” and select the table you created to sync transactions to.
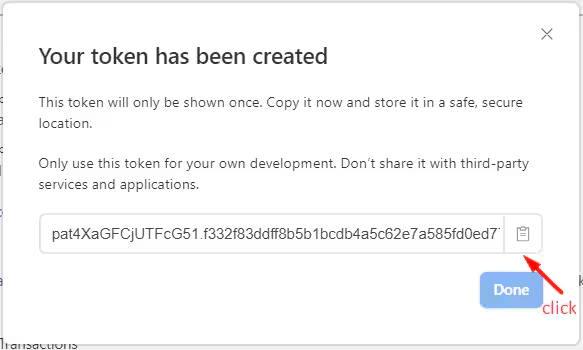
- Click “Create token”.
- Click on the “Copy” icon.
- Paste the copied token into the Access Token field.
- Open your the table you created to sync transactions to.
- Copy its link.
- Paste the copied link into the Table URL field.
3
Click “Connect”.
4
Once connected, you will see a valid connection status.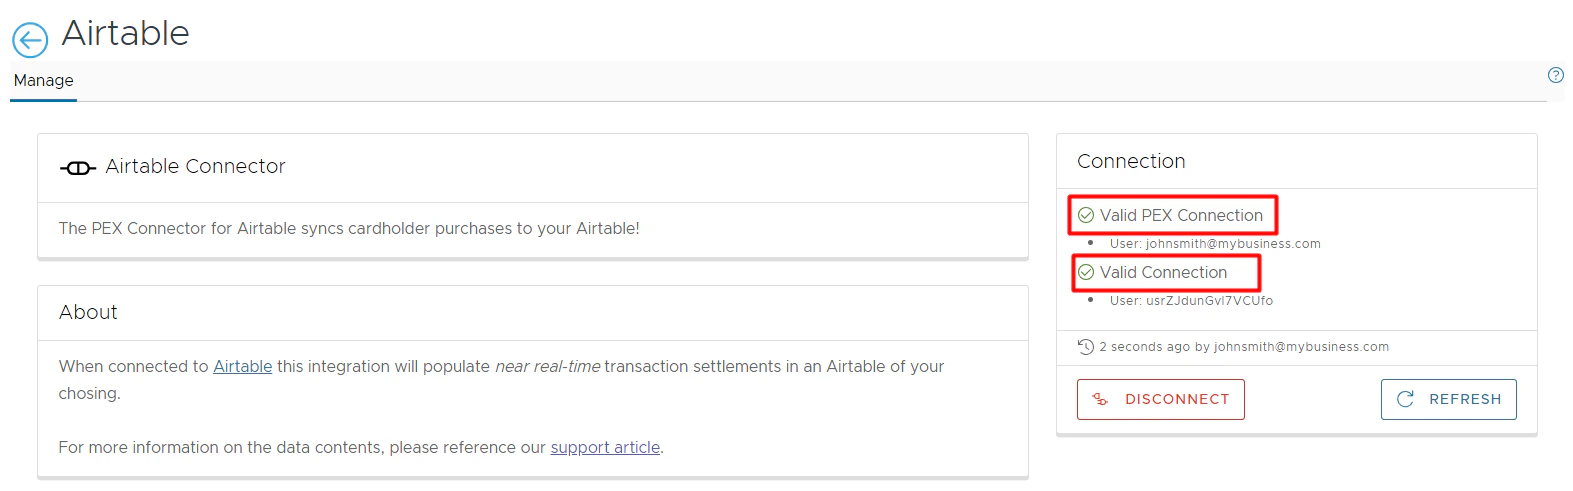
Using App
To view your synced transactions:1
Sign in your Airtable Account.
2
Locate your Airtable base and table that you sync transactions to.
3
Click on it.
4
View your synced settled transactions.
Note:The PEX Connector syncs:
- Only settled transactions.
- No past transactions.