

Step 1: Set up Document Numbering
Ensure document numbering is set up on your Sage account to ensure the transaction receipts port over correctly.1
Navigate to Applications > Company > Setup tab > Company > General Information tab.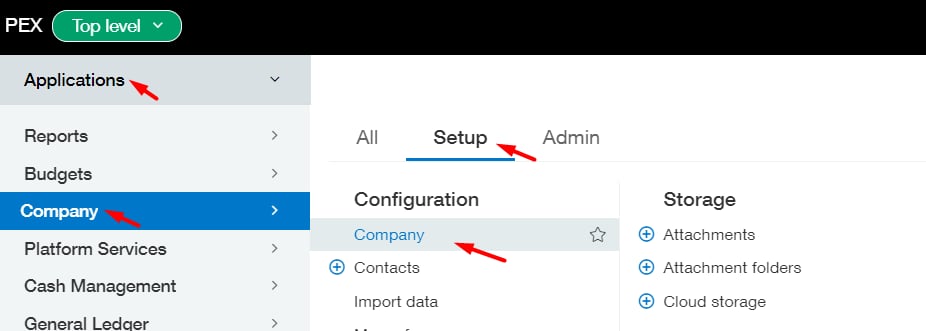
2
Click Edit.
3
Ensure the Attachments sequence type is set to “Attachments”, which will automatically create a unique number for each attachment.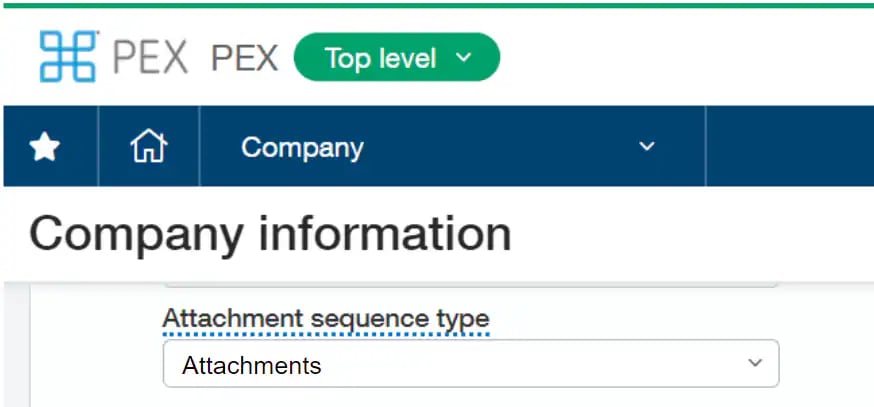
4
Click Save.
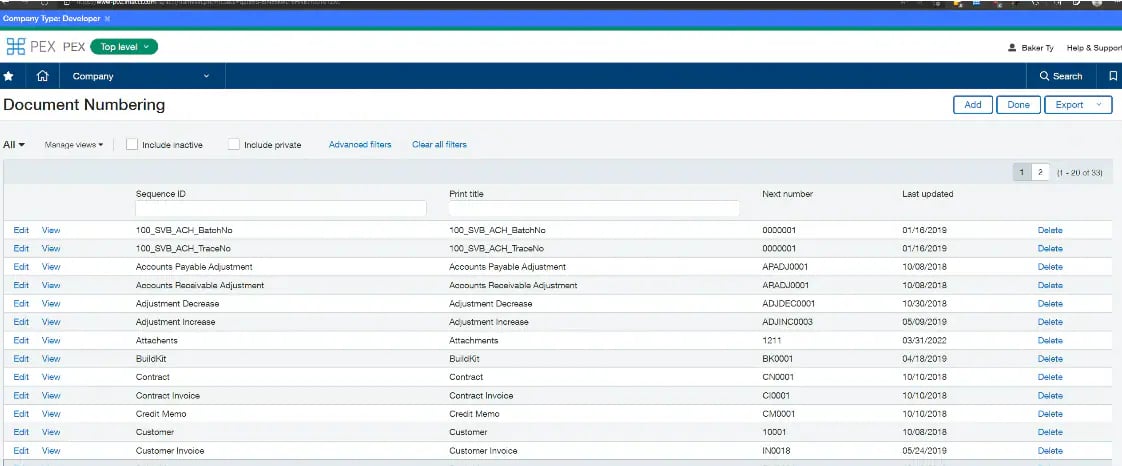
Step 2: Add PEX’s Sender ID
1
Navigate to Applications > Company > Setup tab > Company > Security tab.
2
Click Edit.
3
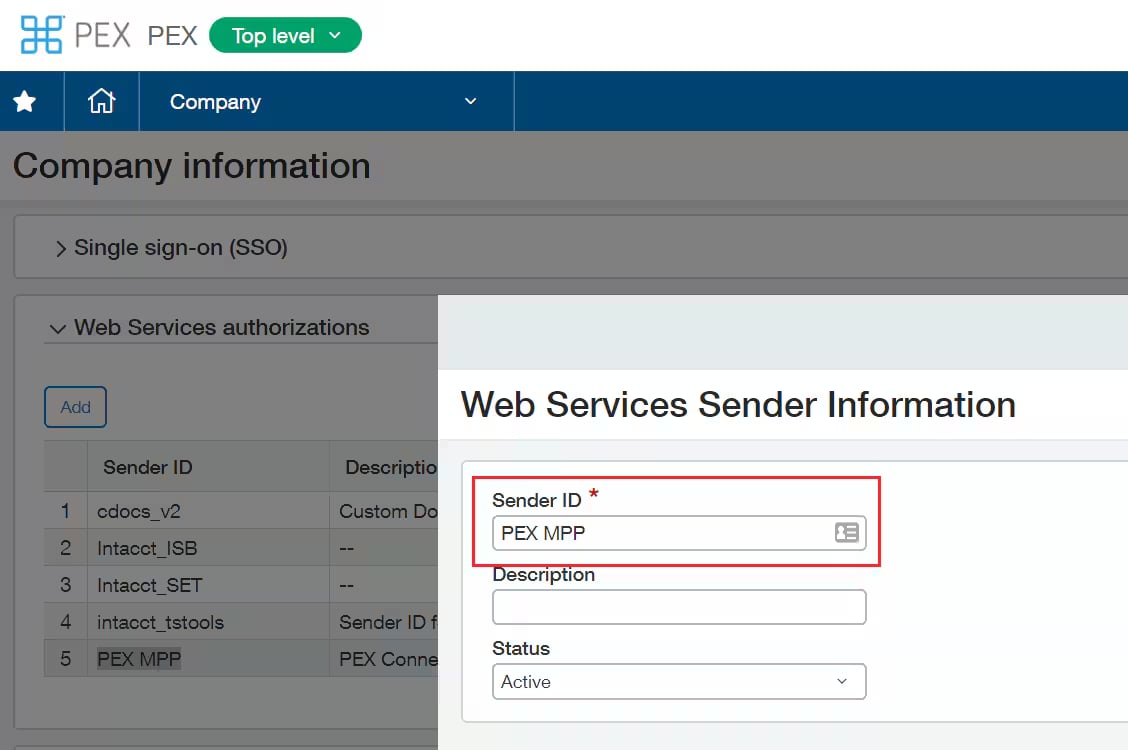
Go to the section labeled “Web Services authorizations”.
Note:You must have Web Services enabled on your account.
4
Click Add.
5
Sender ID = PEX MPP
Note:It is very important to create sender ID exactly as PEX MPP
6
Click Save.
Step 3: Create a Web Service PEX Sync User in Sage Intacct
You must have Web Services enabled in Intacct (Company > Admin tab > Subscriptions).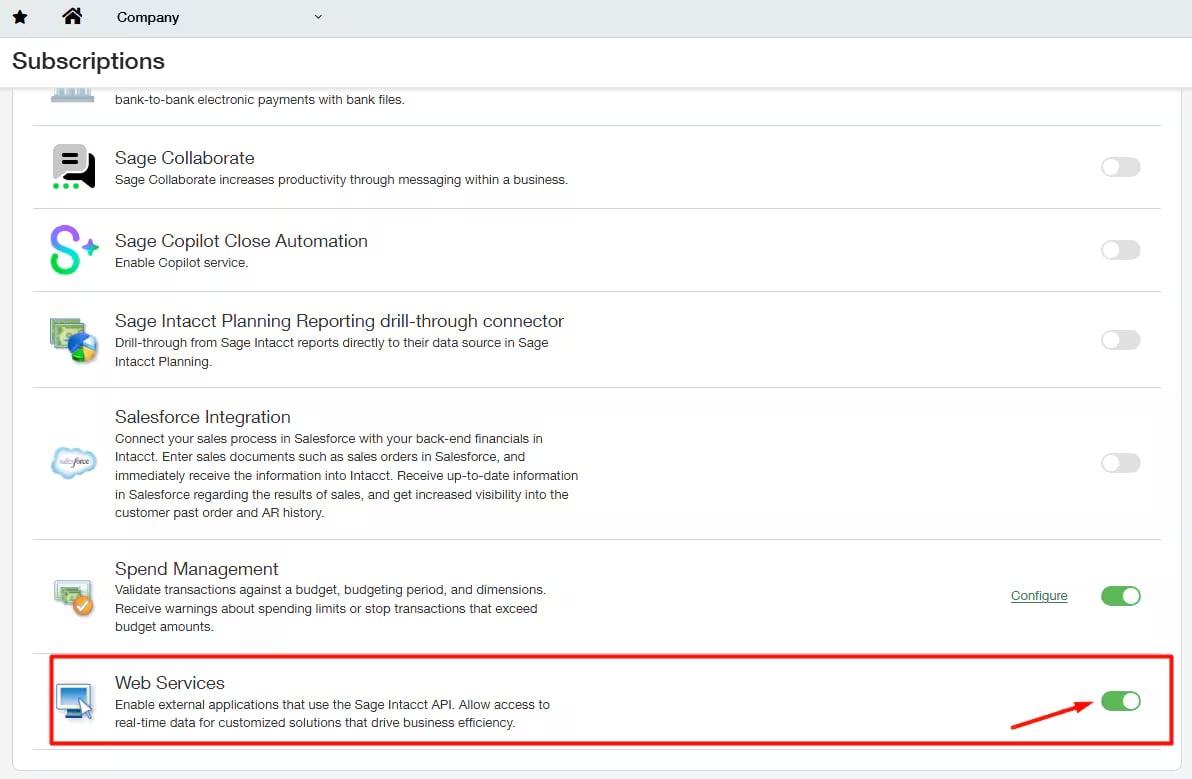
1
Navigate to Company > Company > Admin tab > Web Services users.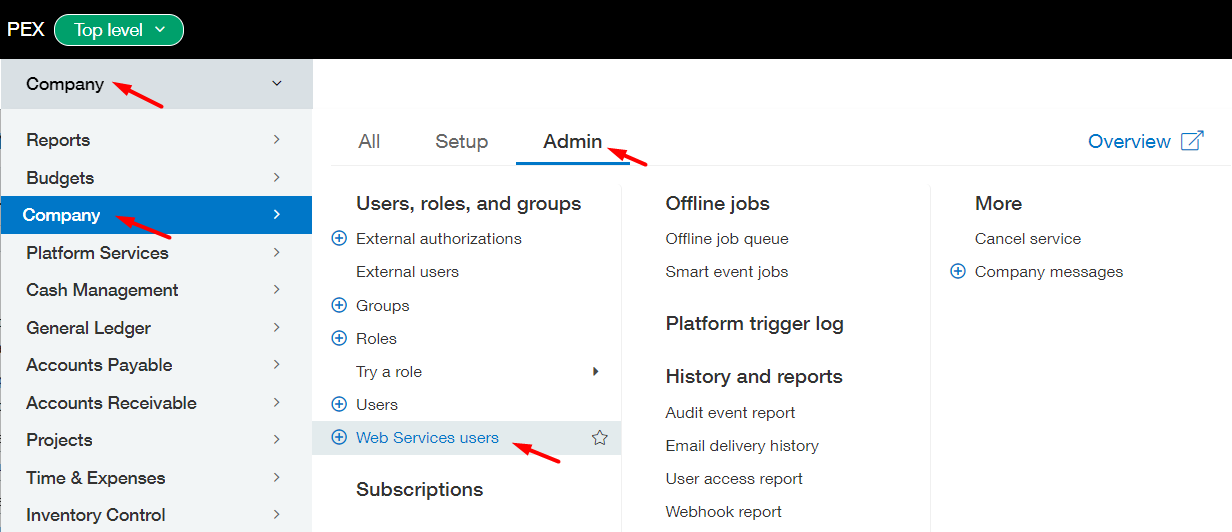
2
Click Add.
3
Set User ID = pex_connector.
Note:This username indicates a non-billable user and is used ONLY for the integration.
4
Email address: Use the email address of the person managing the PEX account or the sync.
5
User Type: select Business.
6
Admin Privileges: select Full.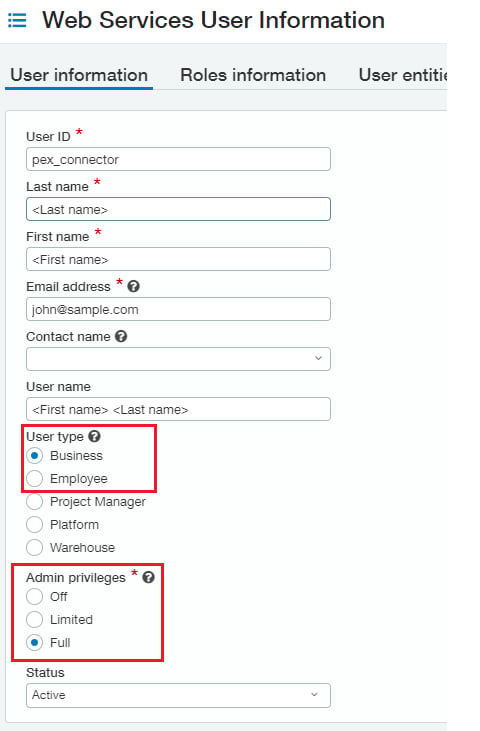
7
Add Role.
8
Click Save.
Step 4: General Ledger Set Up
1
Navigate to General Ledger > All tab > General Ledger accounts.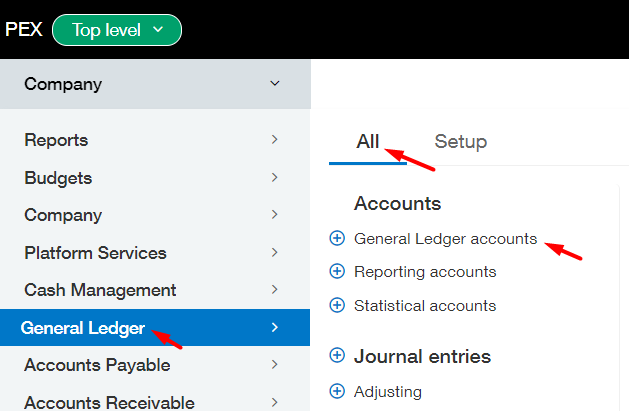
2
Locate your PEX General Ledger Account (e.g., PEX GL Account).
3
Click Edit.
4
Ensure Normal Balance = Debit.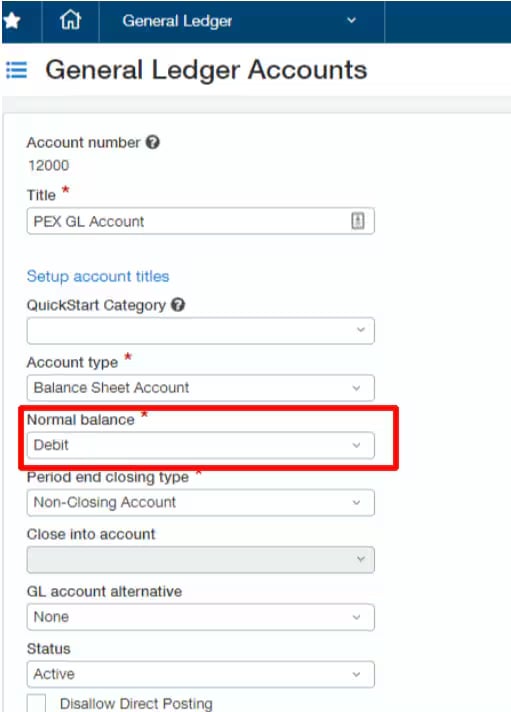
5
Click Save.