1
Log into dashboard.pexcard.com
2
Click the “Business Settings” tab on the left side navigation
3
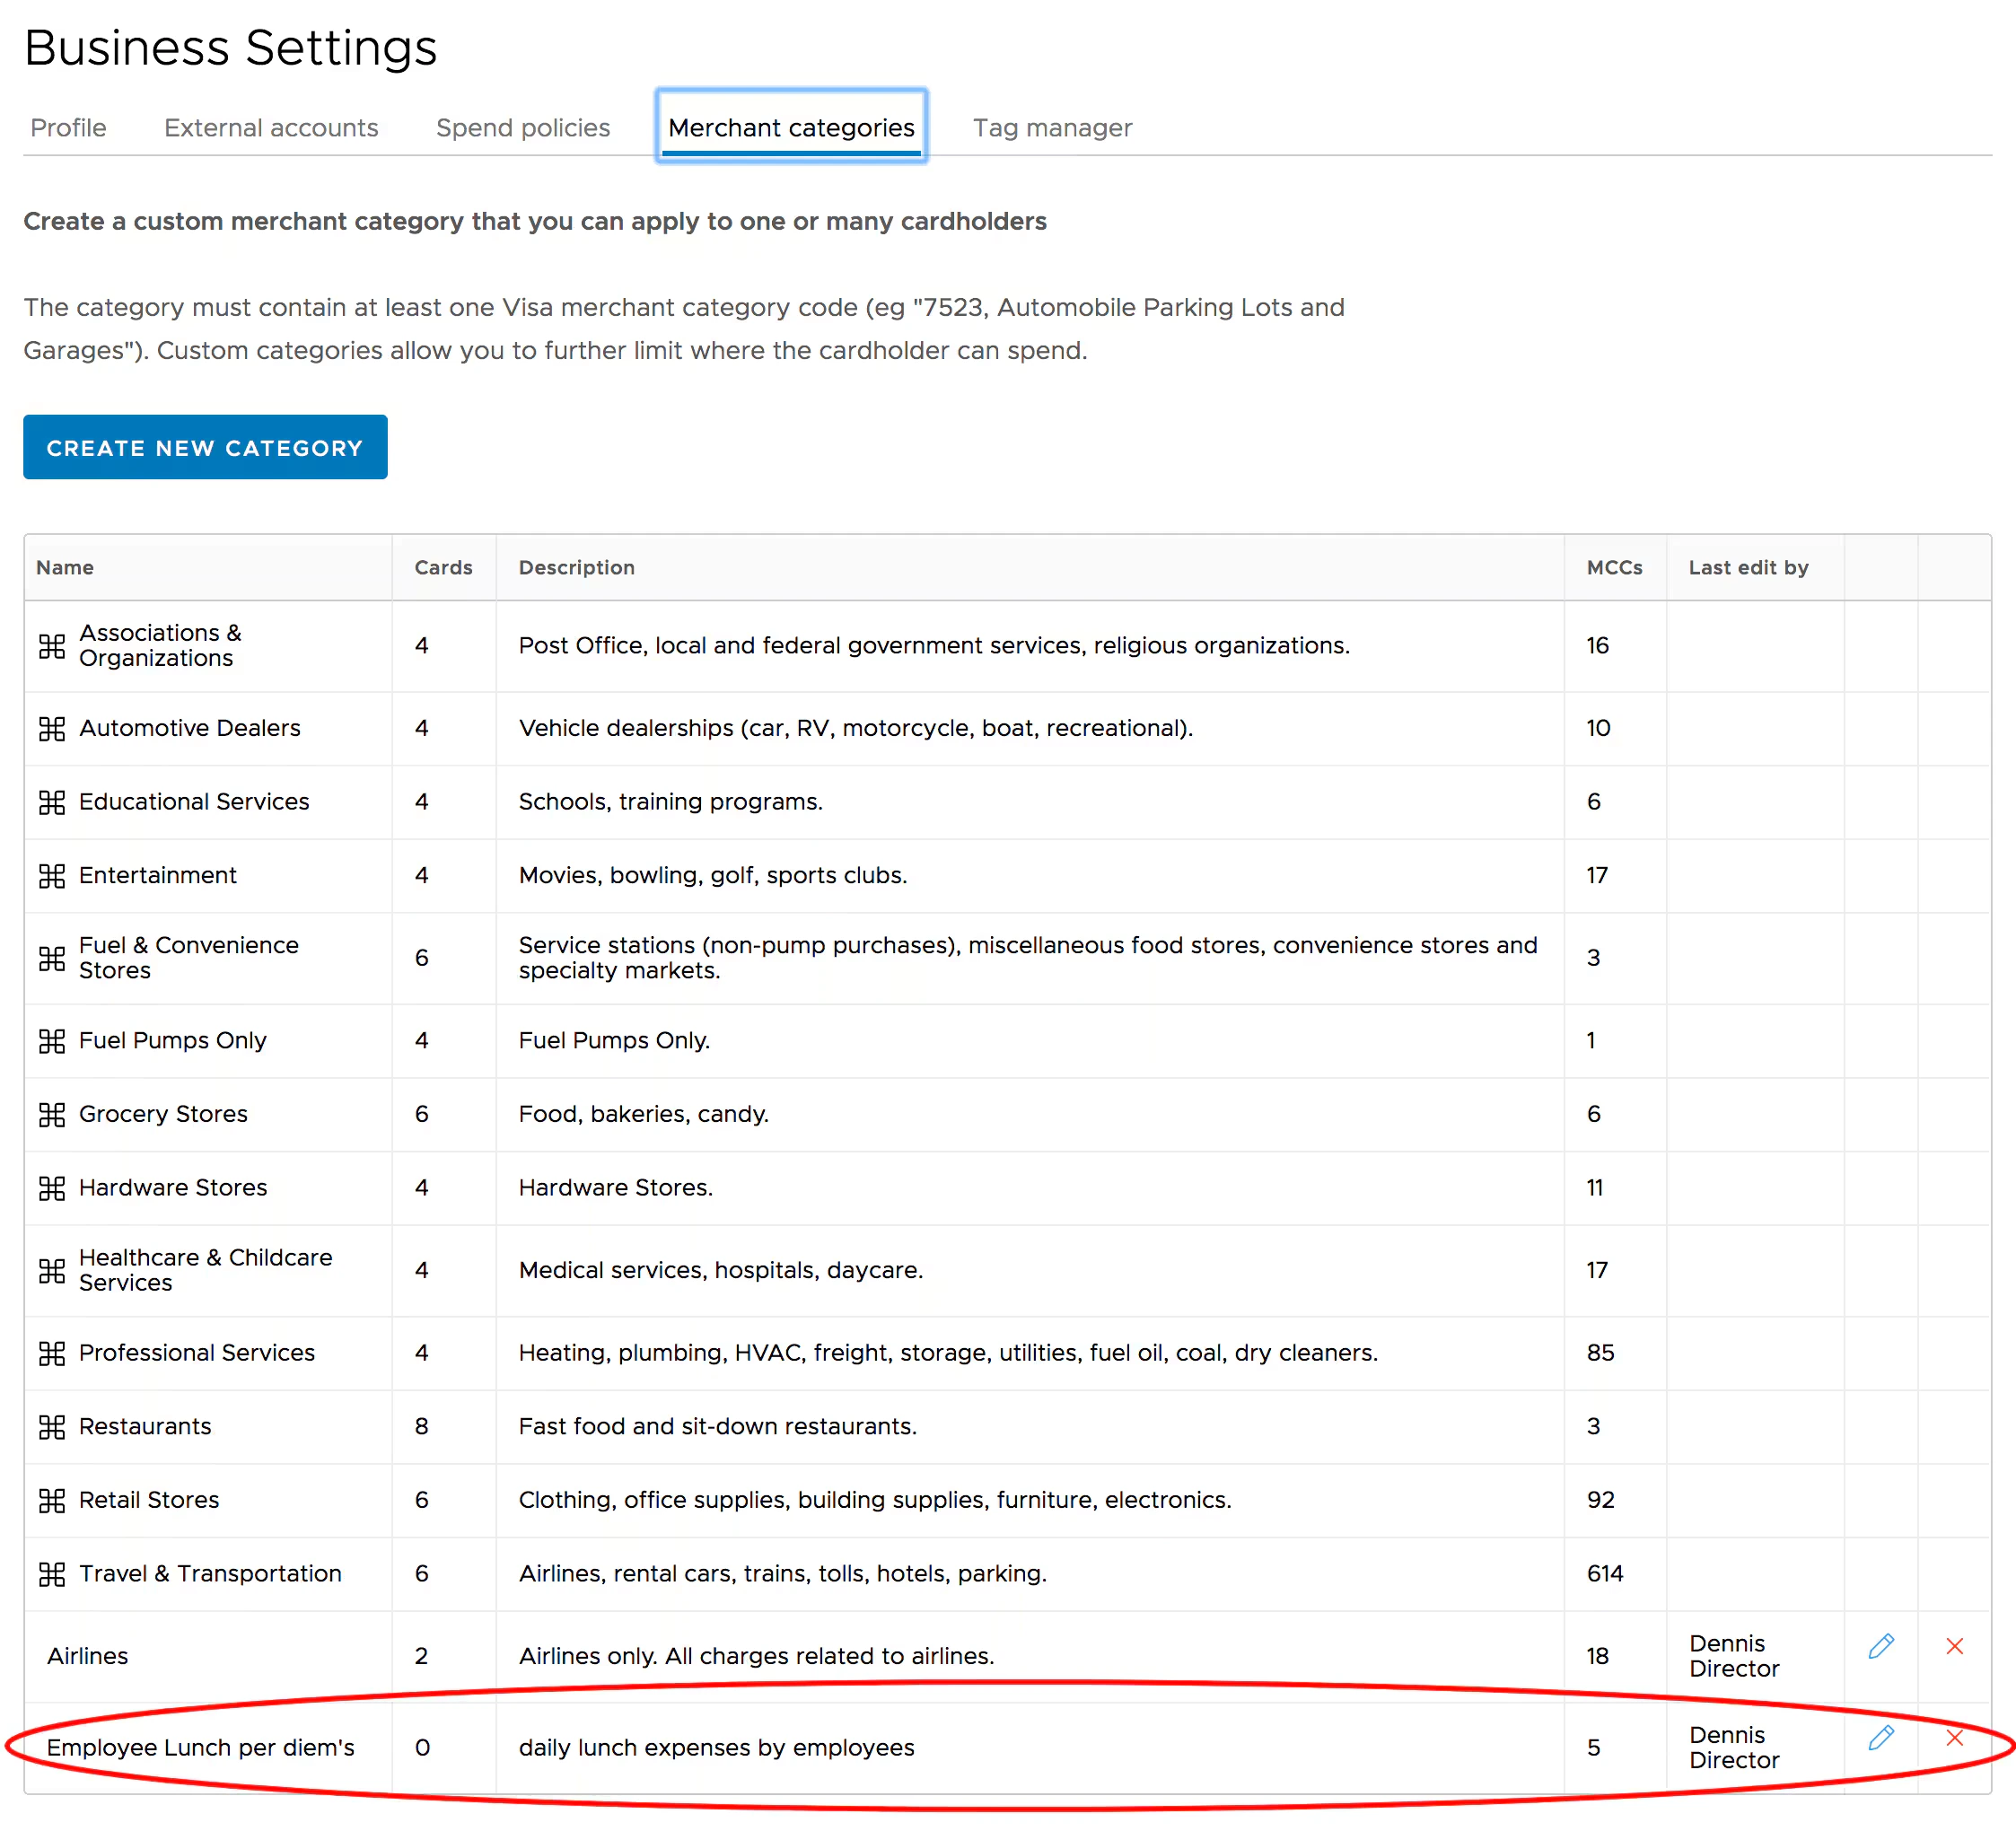
Click the “Merchant categories” tab on Business Settings page
- Any existing custom categories will be listed, along with their descriptions, and the number of cardholders who are assigned that category
4
Click the blue “Create new category” button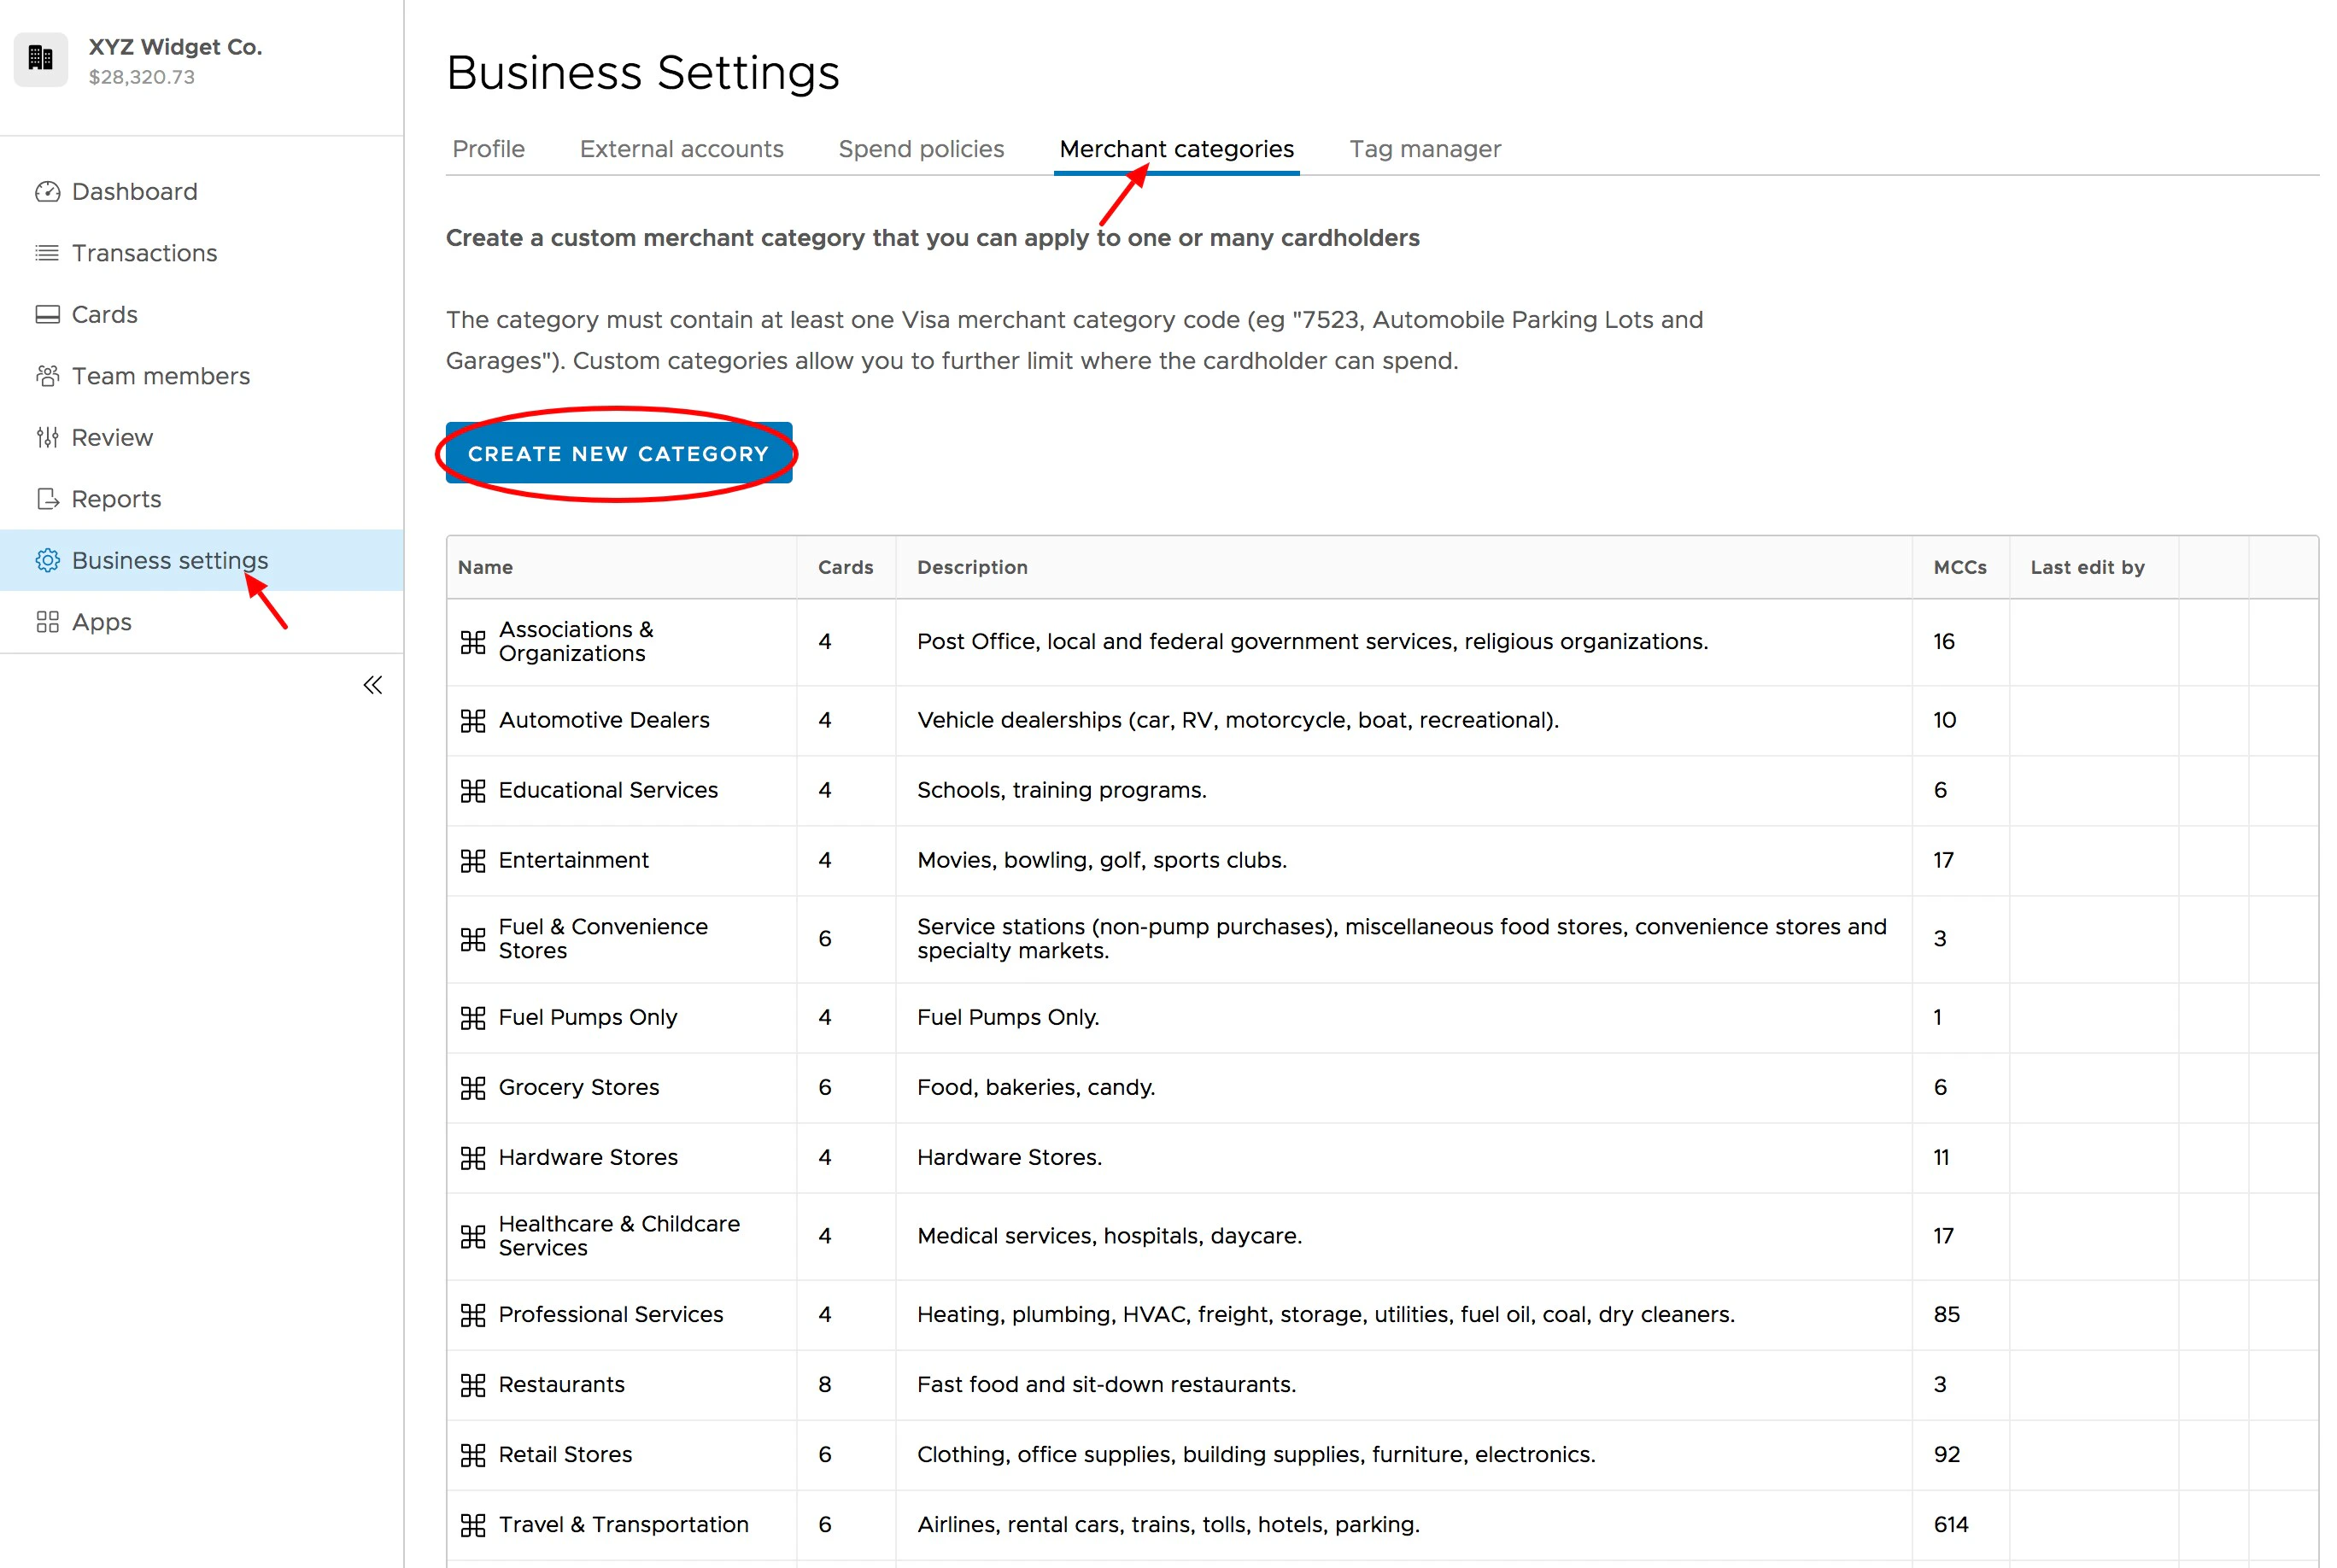
5
On the “New merchant category” page, select one of the following options:
- New empty category:
- Start from scratch
- Add the Visa MCCs that you want to include in the new custom category
- New category based on an existing category
- Start with one of the PEX Original merchant categories
- Add or remove Visa MCCs to suit your needs
6
Name the new merchant category in the field provided
7
Provide a description
- The name of the new category must be unique – you cannot duplicate or repeat names
8
Click the blue “Next” button 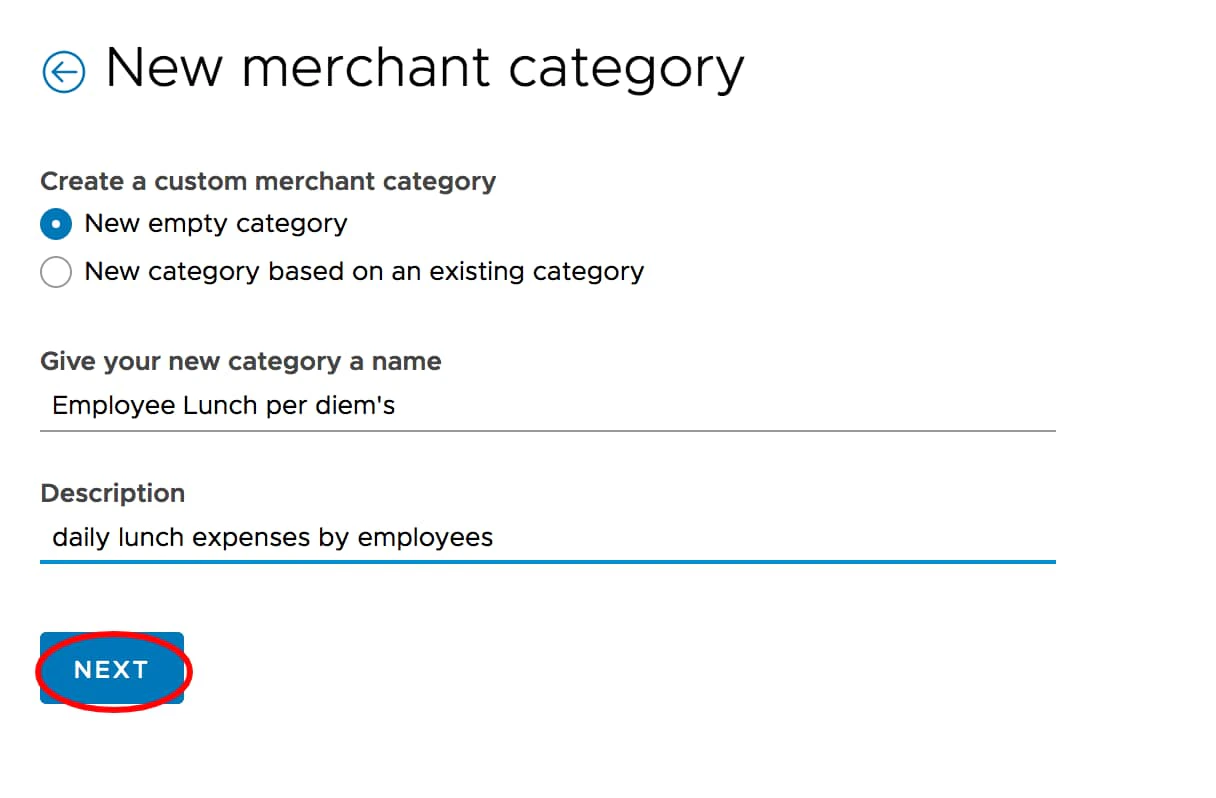
9
Add or remove MCCs to populate your new custom category:
- Select an item in a box
- Click the highlighted arrow to move the item to the adjacent box
10
Click the blue “Create new category” button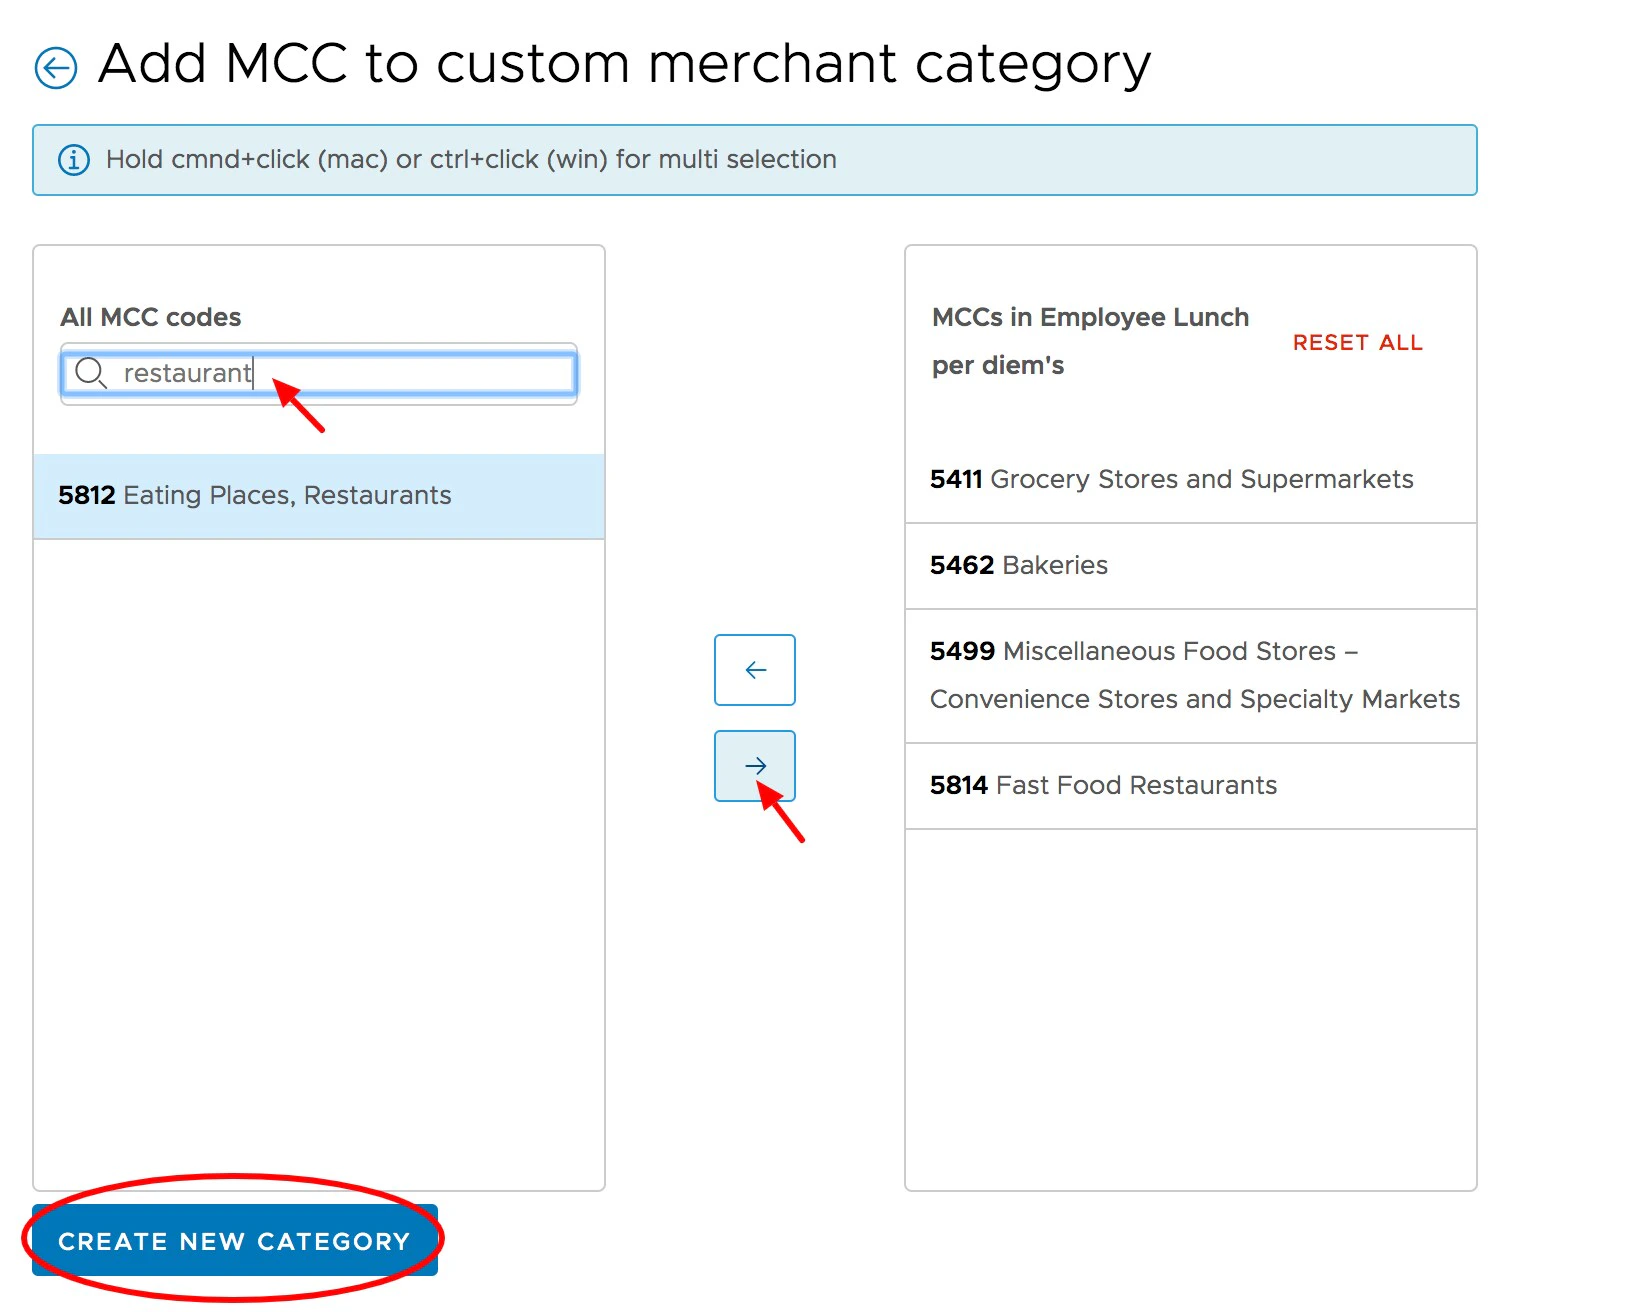
11
The newly created Custom Merchant Category will be added to the list of Merchant Categories.